How to Trim Your Dog’s Nails: A Step-by-Step Guide
Trimming your dog’s nails is essential for their health and comfort, preventing overgrowth, discomfort, and potential injuries; this guide offers a detailed, step-by-step approach to safely and effectively trimming your dog’s nails, ensuring a positive experience for both you and your furry friend.
Ensuring your dog’s comfort and health often involves regular grooming, with trimming their nails being a crucial aspect; this guide walks you through how to properly trim your dog’s nails: a step-by-step guide, turning what might seem daunting into a manageable and stress-free experience for both you and your beloved pet.
Understanding the Importance of Nail Trimming for Your Dog
Regular nail trimming is an essential part of your dog’s overall health and well-being; overgrown nails can lead to a variety of problems, affecting their gait, comfort, and even causing injuries; let’s explore why mastering this skill is so important.
Preventing Overgrowth and Discomfort
When a dog’s nails grow too long, they can start to curl and dig into their paw pads, causing significant discomfort; this is especially true for dogs who spend most of their time indoors and don’t naturally wear down their nails on hard surfaces.
Avoiding Potential Injuries
Overgrown nails are more prone to splitting, cracking, or even getting caught on furniture or carpets, leading to painful injuries; regular trimming helps prevent these accidents, keeping your dog safe and active.
- Prevents painful pressure on the paw pads.
- Reduces the risk of ingrown nails.
- Minimizes the chance of nail injuries during play or walks.
In conclusion, understanding the importance of regular nail trimming is the first step towards ensuring your dog’s comfort and health; neglecting this aspect can lead to pain, discomfort, and potential injuries, highlighting the need for a consistent grooming routine.
Gathering the Right Tools for Safe and Effective Trimming
Before you even think about trimming your dog’s nails, it’s crucial to gather the right tools; using the wrong equipment can lead to discomfort for your dog and a frustrating experience for you; here’s what you’ll need.
Types of Nail Clippers
There are two main types of nail clippers commonly used for dogs: scissor-type clippers and guillotine-type clippers; scissor-type clippers provide more control and are often preferred by professionals, while guillotine-type clippers can be effective but require more precision.
Essential Supplies
In addition to clippers, you’ll want to have a few other items on hand: styptic powder (to stop bleeding if you accidentally cut the quick), treats to reward your dog, and a towel or mat to provide a comfortable surface.
- High-quality nail clippers (scissor or guillotine style).
- Styptic powder to stop bleeding if needed.
- Plenty of your dog’s favorite treats.
- A comfortable towel or mat for your dog to lie on.
Properly equipping yourself with the right tools is a critical step in making nail trimming a safe and stress-free experience for your dog; having everything you need within reach will help you stay calm and focused, ensuring a more positive outcome for everyone involved.
Preparing Your Dog for a Positive Nail Trimming Experience
A crucial part of successful nail trimming is ensuring your dog is comfortable and relaxed; preparing your dog properly can make all the difference between a stressful struggle and a calm, cooperative session; here’s how to set the stage for success.
Desensitization
If your dog is anxious about having their paws handled, start by gradually desensitizing them; gently touch their paws, toes, and nails, rewarding them with treats and praise; do this several times a day, slowly increasing the duration and intensity of your touch.
Acclimation to the Clippers
Introduce your dog to the nail clippers by letting them sniff and examine them; turn the clippers into a positive association by pairing their presence with treats and praise; you can even pretend to trim their nails without actually cutting them.
- Handle your dog’s paws frequently to get them used to being touched.
- Introduce the clippers gradually, associating them with positive reinforcement.
- Practice the trimming motion without actually cutting the nails.
Taking the time to prepare your dog for nail trimming can significantly reduce their anxiety and make the process much smoother; with patience and positive reinforcement, you can create a positive association with nail trimming, making it a more pleasant experience for both of you.
Step-by-Step Guide to Trimming Your Dog’s Nails
Now that you have the right tools and your dog is prepped, it’s time to get down to the actual trimming process; this step-by-step guide will walk you through each stage, ensuring you trim your dog’s nails safely and effectively.
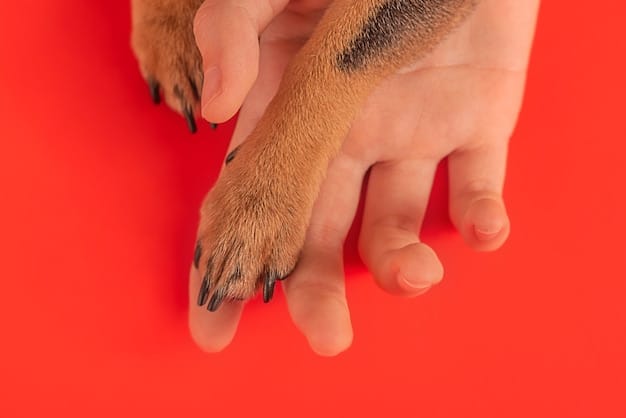
Finding the Quick
The “quick” is the pink part of the nail that contains blood vessels and nerves; cutting into the quick can be painful and cause bleeding, so it’s crucial to avoid it; in dogs with light-colored nails, the quick is usually visible, but in dogs with dark nails, it can be harder to see.
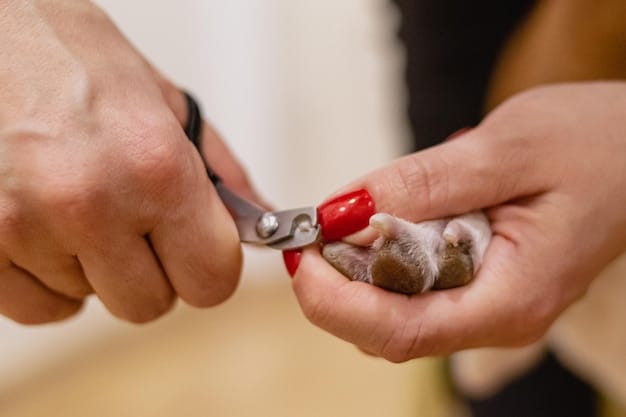
Clipping the Nails
Hold your dog’s paw firmly and position the clippers at the point where you want to make the cut; make small, incremental trims rather than one large cut; this will help you avoid accidentally cutting into the quick.
- Hold the paw firmly but gently.
- Make small, incremental cuts.
- Leave some length behind (about 2 mm).
Following this step-by-step guide will help you trim your dog’s nails safely and effectively, minimizing the risk of injury or discomfort; remember to stay calm and confident, and reward your dog with treats and praise throughout the process.
Dealing with Accidents: What to Do if You Cut the Quick
Despite your best efforts, accidents can sometimes happen; if you accidentally cut into the quick, it’s important to stay calm and act quickly to stop the bleeding; here’s what to do.
Applying Styptic Powder
Styptic powder is your best friend in this situation; apply a generous amount of styptic powder to the bleeding nail, pressing gently but firmly for a few seconds; this will help to clot the blood and stop the bleeding.
Alternative Solutions
If you don’t have styptic powder on hand, you can use cornstarch as a temporary alternative; apply the cornstarch to the nail and press gently until the bleeding stops.
- Apply Styptic powder to the bleeding nail.
- Keep the pressure steady and firm.
- Reapply if bleeding resumes.
Knowing how to handle accidents is an essential part of responsible dog grooming; by staying calm and acting quickly, you can minimize your dog’s discomfort and prevent any further complications.
Establishing a Regular Nail Trimming Routine
Consistency is key when it comes to maintaining your dog’s nail health; establishing a regular nail trimming routine not only keeps their nails at a comfortable length but also helps your dog become more accustomed to the process; here’s how to make it a part of your regular pet care.
Determining Frequency
How often you need to trim your dog’s nails depends on several factors, including their breed, activity level, and the surfaces they walk on; generally, most dogs need their nails trimmed every 2-3 weeks.
Making it a Positive Experience
Associate nail trimming with positive reinforcement by rewarding your dog with treats, praise, and affection; make it a special bonding time, and your dog will be more likely to cooperate.
- Set a fixed schedule (for example, every two weeks).
- Trim nails after a bath or exercise, when the dog is relaxed.
- Always reward the dog with treats and praise after trimming—this is important.
Establishing a regular nail trimming routine benefits your dog’s physical health and strengthens the bond between you and your furry friend; by making it a positive and consistent part of your pet care, you ensure their comfort and well-being.
| Key Point | Brief Description |
|---|---|
| ✔️ Importance | Prevents overgrowth, injury, and discomfort. |
| 🧰 Tools | Clippers, styptic powder, treats. |
| 🐾 Preparation | Desensitize, acclimation, relax. |
| 🩹 Accidents | Use styptic powder if you cut the quick. |
Frequently Asked Questions
▼
The trimming frequency depends on your dog’s breed, lifestyle, and nail growth rate; generally, every 2-3 weeks is a good starting point; if you hear their nails clicking on the floor, it’s time for a trim!
▼
If your dog is fearful, take it slow; start by just touching their paws and rewarding them; gradually introduce the clippers, associating them with positive experiences; consider professional grooming if the fear persists.
▼
With dark nails, it’s harder to see the quick; trim small amounts at a time and look at the cut surface—when you see a small black dot in the center, stop trimming, as the quick is close by.
▼
Both clippers and grinders can be effective; clippers are quicker, while grinders offer more control for shaping the nail; choose whichever you feel more comfortable using and what your dog tolerates best.
▼
Start by gently touching their paws for very short periods, offering treats and verbal praise; gradually increase the duration of your touch, making sure they remain comfortable and relaxed; patience is key here!
Conclusion
Mastering the art of trimming your dog’s nails is a vital aspect of pet care that ensures their comfort and well-being; with the right tools, preparation, and a patient approach, you can make nail trimming a stress-free experience, contributing to a happier and healthier life for your beloved canine companion.


